Introduction
Monitoring plays an inevitable part in any IT infrastructure. It could be argued that monitoring tools are the most essential, providing crucial information that will help you ensure service up time and optimal performance. A well configured monitoring setup will keep track of all the important activities and most importantly alert us in case of problems. This gives the space for system administrators to sleep peacefully knowing that he/she will be alerted in case if something is broken.
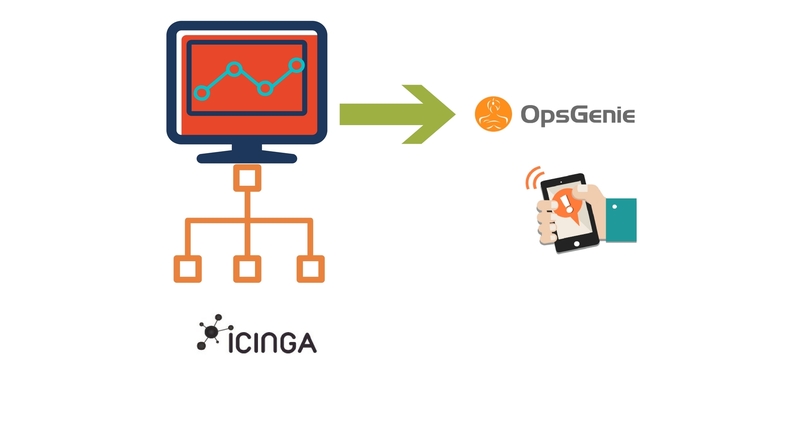
There might be more than one monitoring tool used in most devops environment. In this article we will be seeing the installation and basic configuration of Icinga2 which is the Infrastructure monitoring tool and how to integrate it with opsgenie for the purpose of alerting.
We will be using out of the box configuration of Icinga2 to test our results in this article since customizing icinga2 monitoring is a concept in itself .
Icinga2
Icinga2 is an open source Monitoring tool with which you can monitor almost anything (servers, network, switches, routers etc). Icinga (Icinga 1) is a fork of Nagios with some enhanced graphical Interface and few changes in the architecture . Icinga2 on the other hand was designed from scratch in order to address the longstanding bugs of Icinga.
We will be pairing Icinga2 with Icinga Web 2 as the web client. We can also use Icinga Classic if need be.
There are multiple ways to monitor remote clients. Icinga 2 uses its own unique and secure communication protocol amongst instances. Be it High-Availability cluster setup, distributed load-balanced setup or just a single agent. All communication is secured by SSL x509, and fully supports IPv4 and IPv6.
The “old” NRPE (Nagios Remote Plugin Executor, which we can use in Icinga and Icinga2 as well) protocol is considered insecure and has multiple flaws in its design. In order to stay safe, we will be using the native ‘Icinga 2 client’ for our illustration.
Web-based notification management Integration
Icinga2 in itself has basic notification features like mail and sms (Requires additional configuration). If fiddling with email to SMS gateways, managing on-call schedules and keeping track of monitoring issues sounds like a nightmare, we can integrate Icinga2 with web-based notification management SaaS like opsgenie, pagerduty and Victorops to directly notify the respective oncall person through email,sms and Phone call.
In this article we will see how we can integrate opsgenie with Icinga2. A simple and flexible mail integration as well as a RESTful API allows almost every tool to integrate with OpsGenie. You can set various rules and options within those apps like setting escalation matrix, set alerting rules so that you can combine several incoming notifications into a single meaningful and actionable alert. etc. One other major advantage is that we can pass message to Icinga2 through Opsgenie with the help of a process called Marid (We will see about this later). For example, if you acknowledge an incident through opsgenie, the message will be passed to Icinga2 with the help of Marid and it’ll will stop sending alerts for that specific failure knowing that someone has acknowledged it. Whatever comments or description you add in the notes of an alert in opsgenie, the same will get documented for the specific alert in Icinga. This helps you in getting a clear picture on whats being done when you generate a report in icinga2.
Note: You need to pay for these web based notification services. For more details, check the pricing here for opsgenie, pagerduty and Victorops. If you are fine with the default notification method then you can skip this part.
Some Interesting facts
Icinga is a Zulu word meaning it looks for , it browses , it examines. As far as we can tell, it is pronounced with one of the famous Zulu click consonants. So it should be almost impossible for Non-Zulu people to pronounce it correct. So the best answer probably is: You can pronounce it any way you like.
Let’s Implement it
We need to install the following components in order to successfully setup the aforesaid monitoring type.
The below steps are for doing the installation in Ubuntu 14.04. Please modify your commands as per the flavor which you are using. You should have root or sudo privileges in order to carry out the below tasks.
Installing Icinga 2
Add package repositories
add-apt-repository ppa:formorer/icinga
apt-get update
Installing Icinga 2
apt-get install icinga2
Enabled Features during Installation
By default Icinga2 provides various features like checker, mainlog, notification, graphite, compatlog, debuglog, perfdata etc. The below feature are enabled by default.
- checker for executing checks
- notification for sending notifications
- mainlog for writing the icinga2.log file
You can verify this by running,
icinga2 feature list
For example , If you want to integrate graphite with Icinga2, then you need to enable it by running
icinga2 feature enable graphite
Note, just enabling feature will not make things work. Corresponding configuration changes should be applied for those features to work as expected.
Running icinga2
By default, icinga2 gets added as part of init service in ubuntu. Usage is as below,
/etc/init.d/icinga2
Usage: /etc/init.d/icinga2 {start|stop|restart|reload|checkconfig|status}
Setting up Icinga Web 2
Icinga 2 can be used with Icinga Web 2 and a number of other web interfaces. This article explains how to set up Icinga Web 2.
The DB IDO (Database Icinga Data Output) modules for Icinga 2 takes care of exporting all configuration and status information into a database.
There is a separate module for each database backend. At present support for both MySQL and PostgreSQL is implemented.
Installing and Configuring DB IDO MySQL
apt-get install mysql-server mysql-client
apt-get install icinga2-ido-mysql
Note:
- The mysql-server installation will prompt you to provide root password during the installation process. This will be your root password for the mysql instance. Make a note of it.
- The icinga2-ido-mysql installation will ask you “whether you’d like to enable MySQL for Icinga 2.” Select ‘Yes’ here and hit ENTER. It’ll again ask “if you want the installer to configure the database for you.” If you prefer to configure it manually then you can skip the automated setup
Setting up the MySQL database
After installing mysql and mysql ido packages, we can setup MySQL database for Icinga 2
mysql -u root -p
You need to provide your mysql root password after executing the above command
mysql> CREATE DATABASE icinga; GRANT SELECT, INSERT, UPDATE, DELETE, DROP, CREATE VIEW, INDEX, EXECUTE ON icinga.* TO ‘icinga’@’localhost’ IDENTIFIED BY ‘icinga2password’;
The second command creates a table called ‘icinga‘. We have also created a user called ‘icinga’ and assigned some privileges to the icinga database and also assigned a password icinga2password.
After creating the database you can import the Icinga 2 IDO schema which comes with icinga2 installation
mysql -u root -p icinga < /usr/share/icinga2-ido-mysql/schema/mysql.sql
The icinga2-ido-mysql package provides a new configuration file that is installed in “/etc/icinga2/features-available/ido-mysql.conf”. You will need to update the database credentials in this file.
**
* The db_ido_mysql library implements IDO functionality
* for MySQL.
*/library “db_ido_mysql”
object IdoMysqlConnection “ido-mysql” {
user = “icinga”,
password = “icinga2password”,
host = “localhost”,
database = “icinga”
}
Enabling the IDO MySQL module
icinga2 feature enbale ido-mysql
Module ‘ido-mysql’ was enabled.
Make sure to restart Icinga 2 for these changes to take effect.
After enabling the feature, we need to restart icinga2 for the changes to take effect.
service icinga2 restart
Install Webserver
We need a webserver in order to manage icinga2 through GUI. In this example we will use apache2 as webserver. To install apache2, run the below command.
apt-get install apache2
Setting Up External Command Pipe
Web interfaces and other Icinga addons are able to send commands to Icinga 2 through the external command pipe. Lets enable that as well.
icinga2 feature enable command
service icinga2 restart
By default the command pipe file is owned by the group icingacmd with read/write permissions. Add your webserver’s user to the group icingacmd to enable sending commands to Icinga 2 through your web interface.
Installing Icinga Web 2
The preferred way of installing Icinga Web 2 is to use the official package repositories depending on which operating system and distribution you are running. But it is also possible to install Icinga Web 2 directly from source. In this article we will install Icinga Web 2 from package repositories.
Setting up package repositories
wget -O – http://packages.icinga.org/icinga.key | apt-key add –
add-apt-repository ‘deb http://packages.icinga.org/ubuntu icinga-trusty main’
apt-get update
apt-get install icingaweb2
If everything went well, Icinga web 2 should have been installed by now. Next we need to configure Icinga Web2 which we will do it through GUI.
Now, open a browser and type ‘http://<DNS or ip address>/icinga2web/setup’. This will launch Icinga Web 2 setup wizard.
You’ll see a screen like below.

The only value the setup home page needs is ‘Setup Token’ in order for authentication. The page in itself contains the instructions to generate a new setup token.
The token will be generated using the IcingaCLI. It also describes how to generate a token manually in case the IcingaCLI is missing. Also note that the instructions specifies that we need to create a system group called ‘icingaweb2‘ which the user www-data will be a member of.
By default the group icingaweb2 will be created while installing Icinga web2.
addgroup –system icingaweb2
usermod -a -G icingaweb2 www-data
The below command will create configuration directory for icingaweb2.
icingacli setup config directory –group icingaweb2
Execute the below command to generate the token,
icingacli setup token create
The output will be like – ‘The newly generated setup token is: 9267c5e339dd05b8′.
Copy and paste the token value and hit Next.
You should probably get an error message like below,

Possible reason for the error is, the apache2 user (www-data) does not have access to perform the operation. Chances are you might not have restarted apache2 after adding it to the group ‘icingaweb2′.
Restart apache2 to resolve this and hit Next.
You’ll see a screen showing the available modules. Select the Monitoring module and hit Next.

Next screen will show the list of packages that are required. Packages highlighted in green are already installed. The ones highlighted in yellow are not installed but optional. The ones highlighted in red are not installed and are mandatory.

The screen shot is truncated and the are several other modules which are highlighted in yellow. We need to fix the php timezone error which is highlighted in red.
vi /etc/php5/apache2/php.ini
Search for the value date.timezone and uncomment it by removing the ‘;’ in the starting of the line. You can enter your preferred time zone. The value should look like below.
date.timezone = ‘Asia/Kolkata’
Its up to you to install the optional packages. If no modules are highlighted in red, then we are good to hit the Next button.
In the next screen you’ll be asked to enter the type for Authentication where the users and user groups will be stored. In our example, we will be using Database. If you are using external authentication client, then you need to select External and follow the configuration process accordingly.

In the next page you’ll be asked to enter the details to store users and user groups. You can pass the value for Host as ‘localhost’ if the database is running in the same host or the external server name in which the database is running. By default the port points to 3306. Next you can pass a database and username of your choice. Note that the database itself does not need to exist at this time as it is going to be created once the wizard is about to be finished. You can hit the ‘Valid Configuration’ button to check the validness of the details which you have provided.

Next you’ll be prompted to enter the root mysql user id and password (You can pass the id and password of the user that has enough privilege to create a new DB).

You can keep the default value for the next screen and hit Next.

In the next page, you’ll be asked to enter details for your first administrative account.

The next page will ask for details related to logging. Make changes as per your need and hit next. In this example we will keep the defaults.

In the next page you’ll be asked to verify your details which you have configured so far. Hit Next to confirm the changes. Next you’ll be taken to the welcome page for configuring the monitoring module for Icinga web 2.

In the next screen you’ll get screen for configuring the Monitoring Backend. Pass a name for backend and hit Next.

Next you’ll be asked to fill details for IDO. We have already created a DB called ‘icinga’ earlier. Enter the Database name and username as icinga and the password for the user ‘icinga’ (icinga2password in our case). Validate your configuration and hit next.

Keep the defaults for Command Transport and hit Next.

Keep the defaults for Monitoring security ( To mask the values of custom variables) and hit Next.

Next you’ll be shown the consolidated configuration details for the monitoring module. Review it and hit the Finish button.

If everything goes well, you’ll get a successful set up page as below.

Click ‘Login to Icinga Web2’ in order to enter the login page of Icinga2.

The Dashboard

As you can see, icinga2 comes out with pre-configured alerts that includes disk, http, swap, procs, ssh etc.
Adding Remote host
We need to add clients to the server in order to monitor them. Follow the below steps for adding remote host.
Master Setup for Remote Clients
Master setup requires the following
- SSL CA and signed certificate for the master
- Enabled API feature, and a local Endpoint and Zone object configuration
- Firewall ACLs for the communication port (default 5665)
We can use the CLI command ‘node wizard’ for setting up a new node on the master. The command must be run as root, all Icinga 2 specific files will be updated to the icinga user the daemon is running as (certificate files for example). Run the below command in icinga2 server.
$ icinga2 node wizard
Welcome to the Icinga 2 Setup Wizard!We’ll guide you through all required configuration details.
Please specify if this is a satellite setup (‘n’ installs a master setup) [Y/n]: n
Starting the Master setup routine…
Please specifiy the common name (CN) [icinga2-server.localdomain]:< press Enter to take the default value or enter your CN >
Checking the ‘api’ feature…
‘api’ feature not enabled, running ‘api setup’ now.
information/cli: Generating new CA.information/base: Writing private key to ‘/var/lib/icinga2/ca/ca.key’.
information/base: Writing X509 certificate to ‘/var/lib/icinga2/ca/ca.crt’.
information/cli: Initializing serial file in ‘/var/lib/icinga2/ca/serial.txt’.
information/cli: Generating new CSR in ‘/etc/icinga2/pki/icinga2-node1.localdomain.csr’.information/base: Writing private key to ‘/etc/icinga2/pki/icinga2-node1.localdomain.key’.
information/base: Writing certificate signing request to ‘/etc/icinga2/pki/icinga2-node1.localdomain.csr’.
information/cli: Signing CSR with CA and writing certificate to ‘/etc/icinga2/pki/icinga2-node1.localdomain.crt’.information/cli: Copying CA certificate to ‘/etc/icinga2/pki/ca.crt’.
information/cli: Adding new ApiUser ‘root’ in ‘/etc/icinga2/conf.d/api-users.conf’.
information/cli: Enabling the ApiListener feature.
Enabling feature api. Make sure to restart Icinga 2 for these changes to take effect.
information/cli: Dumping config items to file ‘/etc/icinga2/zones.conf’.
Please specify the API bind host/port (optional):
Bind Host []: <press Enter to take the default value or enter your hostname>
Bind Port []: <press Enter to take the default value or enter the port number>
information/cli: Updating constants.conf.
information/cli: Updating constants file ‘/etc/icinga2/constants.conf’.
information/cli: Updating constants file ‘/etc/icinga2/constants.conf’.
Done.Now restart your Icinga 2 daemon to finish the installation!
The setup wizard will do the following:
- Check if the api feature is already enabled, and if not:
- Generate a local CA in ‘/var/lib/icinga2/ca’ or use the existing one
- Generate a new CSR, sign it with the local CA and copying it into ‘/etc/icinga2/pki’
- Enabling the API feature, and setting optional bind_host and bind_port
- Generate a local zone and endpoint configuration for this master based on FQDN
- Setting the NodeName and TicketSalt constants in constants.conf
You can verify the modified configuration by running the below commands,
egrep ‘NodeName|TicketSalt’ /etc/icinga2/constants.conf
cat /etc/icinga2/zones.conf
Client Setup for Remote Monitoring
Icinga 2 can be installed on Linux/Unix and Windows. While Linux/Unix will be using the CLI command node wizard for a guided setup, you will need to use the graphical installer for Windows based client setup.
Your client setup requires the following
- A ready configured and installed master node
- SSL signed certificate for communication with the master (Use CSR auto-signing).
- Enabled API feature, and a local Endpoint and Zone object configuration
- Firewall ACLs for the communication port (default 5665)
If your remote clients are capable of connecting to the central master, Icinga 2 supports CSR auto-signing.
First you’ll need to define a secure ticket salt in the constants.conf. The setup wizard for the master setup will create one for you already.
Note: Never expose the ticket salt to your clients. This is the master’s private key and must remain on the master providing the CSR Auto-Signing functionality for security reasons.
The client setup wizard will ask you to generate a valid ticket number using its CN. If you already know your remote client’s Common Names (CNs) – usually the FQDN – you can generate all ticket numbers on-demand.
Generate secure ticket salt for CSR Auto-Signing on Icinga2 server for Remote Client. For example,
# icinga2 pki ticket –cn icinga2-node2.localdomain
1268baa4f51f6f8fcd7214d52472883915175fz1
There is no extra client binary or package required. Install Icinga 2 from your distribution’s package repository as described earlier
Run the below commands in your client host,
## Run the below commands in client host ##
add-apt-repository ppa:formorer/icinga
apt-get update
apt-get install icinga2
Next step is to add the client to master through ‘node wizard’.
# icinga2 node wizard
Welcome to the Icinga 2 Setup Wizard!
We’ll guide you through all required configuration details.Please specify if this is a satellite setup (‘n’ installs a master setup) [Y/n]: Y
Starting the Node setup routine…
Please specify the common name (CN) [icinga2-client.localdomain]: <Enter>
Please specify the master endpoint(s) this node should connect to:
Master Common Name (CN from your master setup): < Master CN >
Please fill out the master connection information:
Master endpoint host (optional, your master’s IP address or FQDN): < IP or FQDN >
Master endpoint port (optional) []: <Enter>
Add more master endpoints? [y/N]: <Enter>
Please specify the master connection for CSR auto-signing (defaults to master endpoint host):
Host [192.168.56.101]: <Enter>
Port [5665]: <Enter>
Certificate information:Subject: CN = icinga2-server.localdomain
Issuer: CN = Icinga CA
Valid From: May 2 13:48:16 2016 GMT
Valid Until: Apr 29 13:48:16 2031 GMT
Fingerprint: D1 A1 49 B8 G6 5E 6A 63 A4 22 D0 F6 8B 17 55 F5 A4 BB F5 E6Is this information correct? [y/N]: y
information/cli: Received trusted master certificate.Please specify the request ticket generated on your Icinga 2 master.
(Hint: # icinga2 pki ticket –cn ‘icinga2-server.localdomain’): 1268baa4f51f6f8fcd7214d52472883915175fz1
information/cli: Processing self-signed certificate request. Ticket ‘1268baa4f51f6f8fcd7214d52472883915175fz1‘.information/cli: Writing signed certificate to file ‘/etc/icinga2/pki/icinga2-server.localdomain.crt’.
information/cli: Writing CA certificate to file ‘/etc/icinga2/pki/ca.crt’.
Please specify the API bind host/port (optional):
Bind Host []: <Enter>
Bind Port []: <Enter>Accept config from master? [y/N]: <Enter>
Accept commands from master? [y/N]: <Enter>
information/cli: Disabling the Notification feature.
Disabling feature notification. Make sure to restart Icinga 2 for these changes to take effect.
information/cli: Enabling the Apilistener feature.
Enabling feature api. Make sure to restart Icinga 2 for these changes to take effect.
information/cli: Created backup file ‘/etc/icinga2/features-available/api.conf.orig’.
information/cli: Generating local zones.conf.
information/cli: Dumping config items to file ‘/etc/icinga2/zones.conf’.
information/cli: Created backup file ‘/etc/icinga2/zones.conf.orig’.
information/cli: Updating constants.conf.
information/cli: Created backup file ‘/etc/icinga2/constants.conf.orig’.
information/cli: Updating constants file ‘/etc/icinga2/constants.conf’.
information/cli: Updating constants file ‘/etc/icinga2/constants.conf’.
Done.Now restart your Icinga 2 daemon to finish the installation!
If you get any error during the above step, check if you are able to connect to the master through 5665 or the port which you have configured master to listen.
Restart icinga2 after the successful completion of the node wizard in the client.
service icinga2 restart
Discover Client Services on the Master:
Icinga 2 clients will sync their locally defined objects to the defined master node. That way you can list, add, filter and remove nodes based on their node, zone, host or service name. Execute the below command in icinga2 master
# icinga2 node list
Node ‘icinga2-client.localdomain’ (last seen: Mon May 2 11:05:37 2016)
* Host ‘icinga2-client.localdomain’
* Service ‘apt’
* Service ‘disk’
* Service ‘disk /’
* Service ‘http’
* Service ‘icinga’
* Service ‘load’
* Service ‘ping4’
* Service ‘ping6’
* Service ‘procs’
* Service ‘ssh’
* Service ‘swap’
* Service ‘users’
As you can see, the default configuration checks for apt, disk, http, load, ping, procs, ssh, swap and users.
Generate Configuration for Client Services on the Master
There is a dedicated Icinga 2 CLI command for updating the client services on the master, generating all required configuration.
# icinga2 node update-config
information/cli: Updating node configuration for
Node ‘icinga2-client.localdomain’ (last seen: Mon May 2 11:07:37 2016)
* Host ‘icinga2-client.localdomain’
* Service ‘apt’
* Service ‘disk’
* Service ‘disk /’
* Service ‘http’
* Service ‘icinga’
* Service ‘load’
* Service ‘ping4’
* Service ‘ping6’
* Service ‘procs’
* Service ‘ssh’
* Service ‘swap’
* Service ‘users’
information/cli: Adding host ‘icinga2-client.localdomain’ to the repository.
information/cli: Dumping changelog items to file ‘/var/lib/icinga2/repository/changes/1462201682.2042689-Host-2bf778e52d2e211b87246ce3dcaeb4ff0d0ab3ed0eb4bf8df6af677498fac0de.change’.
.
information/cli: Writing config object ‘icinga2-client.localdomain’ to file ‘/etc/icinga2/repository.d/endpoints/icinga2-client.localdomain.conf’
information/cli: Writing config object ‘icinga2-client.localdomain’ to file ‘/etc/icinga2/repository.d/zones/icinga2-client.localdomain.conf’
Make sure to reload Icinga 2 for these changes to take effect.
By default, the following additional configuration is generated:
- add Endpoint and Zone objects for the newly added node
- add cluster-zone health check for the master host for reachability and dependencies
- use the default templates satellite-host and satellite-service defined in /etc/icinga2/conf.d/satellite.conf
- apply a dependency for all other hosts on the remote satellite prevening failure checks/notifications
After updating the configuration repository, make sure to reload Icinga 2.
service icinga2 reload
That’s it, we have successfully added a client to the Master icinga2 server. You can view the new host entry in the dashboard

Bug (Unable to remove downtime):
As of writing this article, there is a bug in icinga2 version – r2.4.7-1. By default scheduled downtime is added to the Icinga2 master from 11:30 am to 12:30 pm. If you try to remove it through the web interface, you’ll not be able to do it. There is a work around to fix this.
- Remove the downtime entries in services.conf
# vi /etc/icinga2/conf.d/services.conf
Search for the below lines and remove it (The line numbers are 86 and 87).
/* Used by the ScheduledDowntime apply rule in `downtimes.conf`. */
vars.backup_downtime = “02:00-03:00”
- Delete the entry manually from the mySQL database
# mysql -u root -p
mysql> show databases;
mysql> use icinga;
mysql> select scheduleddowntime_id from icinga_scheduleddowntime;
+———————-+
| scheduleddowntime_id |
+———————-+
| 4 |
+———————-+
1 row in set (0.00 sec)mysql> delete from icinga_scheduleddowntime where scheduleddowntime_id = 4;
Query OK, 1 row affected (0.00 sec)
- Remove additional files
rm -rf /var/lib/icinga2/api/packages/_api/*/conf.d/downtimes
service icinga2 restart
Above steps will fix the issue related to downtime.
Notification through mail
To test whether you are getting alerted through mail, modify ‘/etc/icinga2/conf.d/users.conf’ and replace the value of email point to your mail id. Also make sure you have configured postfix or sendmail to process the mail. The file should look something like this,
/**
* The example user ‘icingaadmin’ and the example
* group ‘icingaadmins’.
*/object User “icingaadmin” {
import “generic-user”display_name = “Icinga 2 Admin”
groups = [ “icingaadmins” ]email = “[email protected]”
}object UserGroup “icingaadmins” {
display_name = “Icinga 2 Admin Group”
}
OpsGenie Icinga2 Integration
The integration of opsgenie with icinga2 is pretty straigh forward. OpsGenie Icinga2 integration plugin utilizes full capabilities of OpsGenie and provides two-way integration with Icinga2. Using the integraton:
- Icinga2 sends alerts to OpsGenie with scaringly detailed information. OpsGenie acts as a dispatcher for Icinga2 alerts, determining the right people to notify based on on-call schedules, using email, phone calls, text messages (SMS) and iPhone & Android push notifications, and escalating alerts until the alert is acknowledged or closed.
- OpsGenie automatically connects to Icinga2, gets performance data from Graphite for the host/service and attaches it to the alert. For this to work, we should configure and enable graphite module in icinga2
- OpsGenie posts alert updates to Icinga2, e.g. acknowledging the alert will automatically ack the alert in Icinga2, alert comments are reflected to Icinga2 etc.
Before beginning this part, create an account with opsgenie. If you are testing, then you can opt for 14 days free trail that they offer.
Installation
The plugin should be installed on the same server Icinga2 is running.
wget https://s3-us-west-2.amazonaws.com/opsgeniedownloads/repo/opsgenie-icinga2_2.0.0_all.deb
dpkg -i opsgenie-icinga2_2.0.0_all.deb
You might receive warnings stating ‘No java executable found.’ This means that java is not installed in the server. Lets install it before we proceed further.
Install Java
Lets install oracle JDK 8,
apt-get install python-software-properties
add-apt-repository ppa:webupd8team/java
apt-get update
apt-get install oracle-java8-installer
If you have multiple versions of java already installed, then you can the one which you prefer by running.
update-alternatives –config java
Set the JAVA_HOME path in ‘/etc/environment’ file. The file should look something like below,
PATH=”/usr/local/sbin:/usr/local/bin:/usr/sbin:/usr/bin:/sbin:/bin:/usr/games:/usr/local/games”
JAVA_HOME=”/usr/lib/jvm/java-8-oracle/jre/bin/java”
Source the file to get the environment variables in the present session,
source /etc/environment
Add Icinga2 integration in OpsGenie
Login to OpsGenie dashboard (Opsgenie Login).
1. Select Integration

2. Search for icinga2

3. Select icinga2. Make a note of the API Key and click save configuration


OpsGenie Plugin Configuration in Icinga2
The plugin uses a golang-executable file (included in the plugin as icinga2opsgenie) to create, acknowledge and close alerts in OpsGenie. Icinga2 should be configured to execute this file on events to create, acknowledge and close alerts in OpsGenie.
Setting the apiKey is required. Other configuration parameters are set to defaults that work with most Icinga2 implementations but may need to be modified as well.
Edit the file ‘/etc/opsgenie/conf/opsgenie-integration.conf “. It should ideally contain the below values
apiKey=<Your opsgenie – Icinga2 integraiton API>
icinga.api_url=https://localhost:5665
icinga.graphite_url=http://localhost:5003 (optional)
icinga.user=root
icinga.password=<api password>
icinga.http.timeout=30000
You can get the icinga2 API password by running the below command,
grep password /etc/icinga2/conf.d/api-users.conf
Optional : If you want to get a graphical report based on data points, you can integrate graphite with icinga2. The advantage is that OpsGenie automatically connects to Icinga2, gets performance data from Graphite for the host/service and attaches it to the alert.
Configure OpsGenie to Icinga Integration – Marid (Optional)
The plugin uses Marid utility (included in the plugin) to enrich alerts when they get created and to update the state of the them in Icinga2 when they get updated in OpsGenie. For example, when an alert is created in OpsGenie, Marid gets the details(histogram, trends etc.) from Icinga2 and attaches them to the alert. Also when users acknowledge an alert from their mobile devices using the OpsGenie app, alert gets acknowledged in Icinga2, and when users add comments to alerts in OpsGenie, comments get posted to Icinga2 as well. Marid subscribes to alert actions in OpsGenie and reflects these actions on Icinga2 using Icinga2 CGIs.
Note: In order to use this feature “Send Alert Actions To Icinga2” checkbox should be enabled in OpsGenie Icinga2 Integration.
Marid is a java application; therefore requires the Java Runtime version 1.6+ Both the Open JDK and Oracle JVMs can be used.
We have already make the necessary configuration changes for Marid to work.
Lets start marid by running,
service marid start
Testing the Integration and Troubleshooting
Finally we have completed all the necessary configurations and its time to test now.
If the integration works as expected, when a host or service state becomes down in Icinga2, an alert will be created in OpsGenie. When the host or service comes back up, the alert in OpsGenie will get closed automatically as well.
Verify that icinga can access OpsGenie
Create a test alert in OpsGenie from the shell
/usr/bin/icinga2opsgenie -entityType=host -t=PROBLEM -hs=DOWN -hn=test_host
Check whether the alert is created in OpsGenie. If not, check the logs in /var/log/opsgenie/icinga2opsgenie.log for any error messages.
If successful, you should see a message as below in the logs,
2016-05-09 09:08:57.305 WARNING [HostName: test_host, HostState: DOWN]Trying to send data to OpsGenie with timeout: 10
2016-05-09 09:08:57.660 WARNING [HostName: test_host, HostState: DOWN]Data from Icinga posted to OpsGenie successfully; response:{“took”:14,”code”:200,”status”:”successful”}
Opsgenie Alert Dashboard:

You would also get a notification through your mobile and an email followed by sms and a voice call. This basically follows the Notification Rules that you set under your profile in OpsGenie.
We have successfully implemented Icinga2 with Opsgenie.

