- Openldap Tutorial – Practical Realtime Implementation and Integration
- Installation and configuration of openldap in Ubuntu
- Installing phpLDAPadmin – Web based LDAP Client
- Planning of LDAP DIT Structure and Config of Overlays ( access, ppolicy )
- OpenLDAP – Graylog LDAP Integration
- openLDAP – Linux Client LDAP Integration
- openLDAP – Basic Authentication using LDAP
- openLDAP – Self Service Password and Adhoc LDAP utilities
This article deals with the installation and configuration of openldap in ubuntu 16.04
Install Openldap
Open your terminal and execute the below command
apt install slapd ldap-utils
In the next screen provide your LDAP admin password and select OK.

You’ll be asked to confirm your admin password again

We have now installed openldap but we will customize the configuration again. You can verify the installation by checking if the slapd service is running.
systemctl status slapd
The above steps would have installed openldap and configured it with the default values for suffix. In order to have a more specific installation, we will relaunch the configuration through the debian tool.
dpkg-reconfigure slapd
You’ll be prompted with a window as below. Select ‘No‘ in order to write a new configuration

In the next step enter the domain name that will be our DIT suffix. ( devopsideas.com in this example )

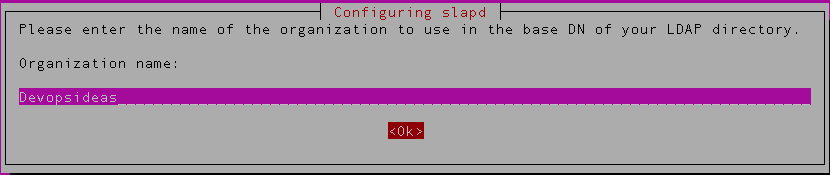
Next you need to enter the name of your organization,
Next you’ll be asked to enter administrator password ( This is the credentials for the rootDN of your database instance )
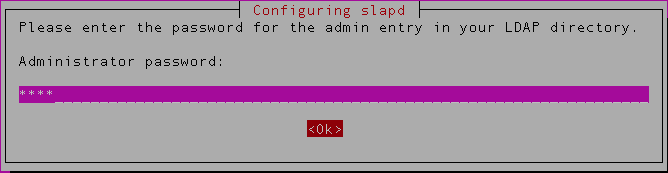
Confirm the password again,

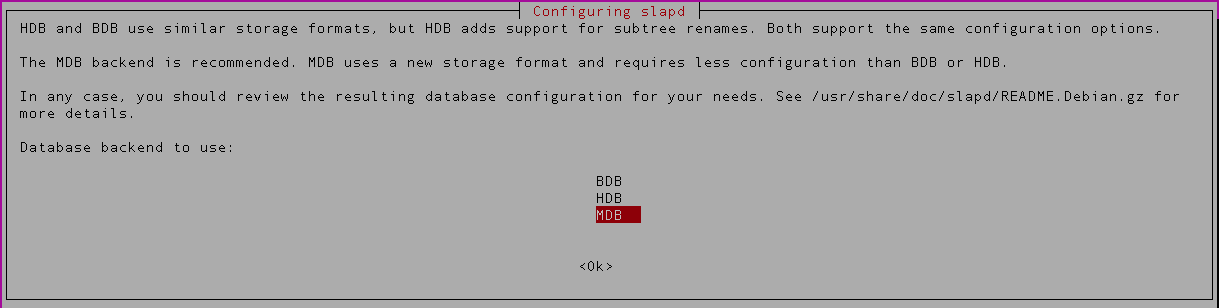
Next you can choose the backend database. We’ll be using the default MDB in this example,
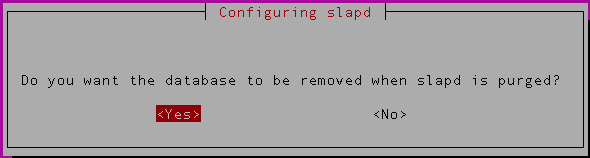
In the next step, it’ll ask whether the database should be removed when removing openldap. If you have a good backup in place, you can select ‘Yes‘ for this option.
Purge old (dirty) directory. The debian installer will detect the old installation, it suggests you to move the old directory. If you have given Yes in the previous step, select ‘Yes‘ in this step as well.

In the next step, LDAP protocol version to be used. If this is a fresh install, you can disallow LDAPv2. If you have existing application that uses LDAP and that needs LDAPv2, then you need to select ‘Yes‘. For this example we will select ‘No’.

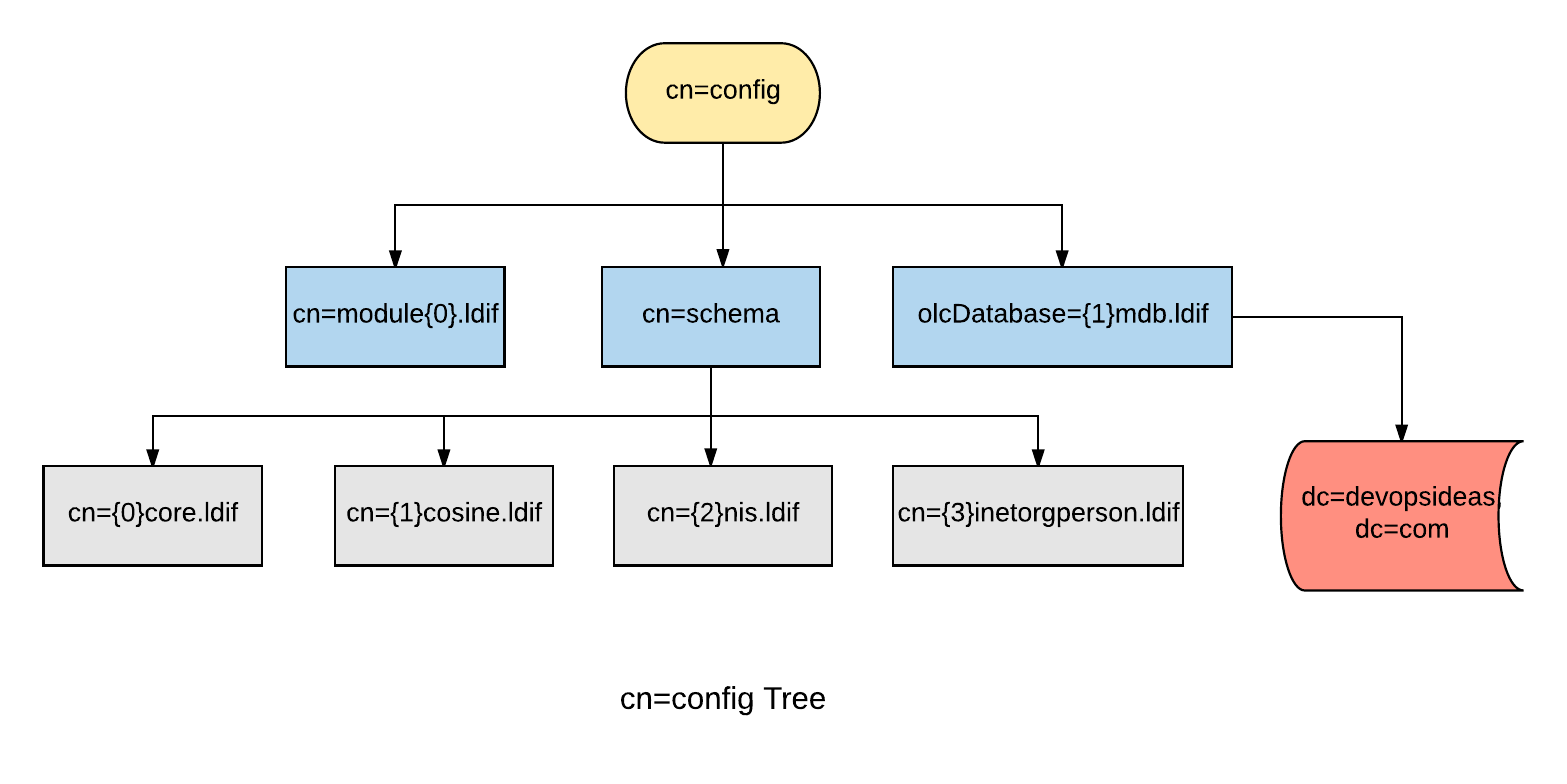
We are done with the installation and re-configuration steps. The installation process set up 2 DITs. One for slapd-config (cn=config) and one for our own data (dc=devopsideas,dc=com). Let’s take a look.
Olc / slapd.d / cn=config Method
The configuration we will see here is OLC ( Online Configuration ) or otherwise called as slapd.d or cn=config configuration. The OLC configuration allows us to make changes dynamically. There is no need for the restart of the slapd process after any configuration changes which was not the case in the earlier slapd.conf configuration.
For this purpose, slapd is designed to be configured within slapd itself by dedicating a separate DIT for that purpose. This allows one to dynamically configure slapd without the need to restart the service.
(Other objects may be part of the configuration but were omitted from the illustration for clarity).
This is what the slapd-config database/DIT looks like and it lives under /etc/ldap/slapd.d
    /etc/ldap/slapd.d/
    /etc/ldap/slapd.d/cn=config.ldif
    /etc/ldap/slapd.d/cn=config
    /etc/ldap/slapd.d/cn=config/cn=schema
    /etc/ldap/slapd.d/cn=config/cn=schema/cn={1}cosine.ldif
    /etc/ldap/slapd.d/cn=config/cn=schema/cn={0}core.ldif
    /etc/ldap/slapd.d/cn=config/cn=schema/cn={2}nis.ldif
    /etc/ldap/slapd.d/cn=config/cn=schema/cn={3}inetorgperson.ldif
    /etc/ldap/slapd.d/cn=config/cn=module{0}.ldif
    /etc/ldap/slapd.d/cn=config/olcDatabase={0}config.ldif
    /etc/ldap/slapd.d/cn=config/olcDatabase={-1}frontend.ldif
    /etc/ldap/slapd.d/cn=config/olcDatabase={1}mdb.ldif
    /etc/ldap/slapd.d/cn=config/olcBackend={0}mdb.ldif
    /etc/ldap/slapd.d/cn=config/cn=schema.ldif
As you can see, some classical schemas (cosine, nis, inetorgperson) come pre-loaded with slapd. There is also an included “core” schema, a pre-requisite for any schema to work. olcDatabase={1}mdb.ldif is the database instance that contains dc=devopsideas,dc=com DIT
To understand it easier, you can think of cn=config as the global config option that gets applied to all DIT’s that we create. From the diagram we can see that the configuration is common to olcDatabase={1}mdb.ldif database. If we create another DIT, for example dc=example,dc=com the cn=config configuration will be global to that as well.
LDAP search command
ldapsearch command is part of the ldap utils package and which we will use predominantly in openldap. Let us run our first ldapsearch command to see what we have in our DIT dc=devopsideas,dc=com
$ ldapsearch -W -LLL -D cn=admin,dc=devopsideas,dc=com -b dc=devopsideas,dc=com 'dn'

Enter LDAP Password:

dn: dc=devopsideas,dc=com

dn: cn=admin,dc=devopsideas,dc=com
ldapsearch command explanation,
-W – Prompt for simple authentication. This is used instead of specifying the password on the command line.
-D – Distinguished name to bind to the LDAP directory. In this case we are binding with our admin credential
-LLL – A single -L restricts the output to LDIFv1. A second -L disables comments. A third -L disables printing of the LDIF version
-b – searchbase – This defines the starting point for the search instead of the default
dn – This will filter the output to display only the values of dn
-
Explanation of entries:
-
dc=devopsideas,dc=com: base of the DIT
-
cn=admin,dc=devopsideas,dc=com: administrator (rootDN) for this DIT (set up during package install)
-
Configuring credentials for cn=config
By default there is no administrative account created for the slapd-config database. Hence we need to create a new DN (cn=admin,cn=config) and provide access to cn=config DIT. We will be using ldapmodify command and LDIF ( LDAP Data Interchange Format ) to achieve this. LDIF is a standard plain text data interchange format for representing LDAP (Lightweight Directory Access Protocol) directory content and update requests.
First, we will create the ssha encrypted password that we will us in the LDIF file. Run the below command to create ssha encrypted password.
slappasswd -h {ssha}
New password:
Re-enter new password:
{SSHA}cvSVqzUKS/RG1aPIDIKGLJtL4tl1tX9/
You’ll be prompted to enter the password. Once you confirm the password, you’ll get the hashed content of the password you entered.
Create the LDIF file to make necessary configuration changes in cn=config. Create a file called config.ldif and copy the below content to it.
dn: cn=config
changetype: modify

dn: olcDatabase={0}config,cn=config
changetype: modify
add: olcRootDN
olcRootDN: cn=admin,cn=config

dn: olcDatabase={0}config,cn=config
changetype: modify
add: olcRootPW
olcRootPW: {SSHA}cvSVqzUKS/RG1aPIDIKGLJtL4tl1tX9/
Description of the above content,
1) The first line indicates that the change we are going to make is in cn=config. The space between content indicates that it is a different change
2) The second para (dn: olcDatabase={0}config,cn=config) indicates that we are going to make the change in slapd configuration database (cn=config). The changetype is modify (since we are modifying existing entry ) and the type of change is add. Here we are adding olcRootDN and assigning it a value ‘cn=admin,cn=config’. ( Basically we are setting a rootDN to access cn=config )
3) Similar to the previous change, we are adding another attribute ‘olcRootPW’ and assigning it the value that we got through slappasswd.
Next, implement the changes using ldapadd command and by passing the content of above file as input
$ ldapadd -Y EXTERNAL -H ldapi:/// -f config.ldif

SASL/EXTERNAL authentication started
SASL username: gidNumber=0+uidNumber=0,cn=peercred,cn=external,cn=auth
SASL SSF: 0
modifying entry "cn=config"

modifying entry "olcDatabase={0}config,cn=config"

modifying entry "olcDatabase={0}config,cn=config"
The content highlighted in blue indicates that changes are implemented without any errors. The ldapadd command is used to add new entries. There is also an ldapmodify command which is used to modify existing entries.
Let’s verify the change by accessing cn=config DIT,
# ldapsearch -W -LLL -D cn=admin,cn=config -b cn=config dn
Enter LDAP Password:
dn: cn=config

dn: cn=module{0},cn=config

dn: cn=schema,cn=config

dn: cn={0}core,cn=schema,cn=config

dn: cn={1}cosine,cn=schema,cn=config

dn: cn={2}nis,cn=schema,cn=config

dn: cn={3}inetorgperson,cn=schema,cn=config

dn: olcBackend={0}mdb,cn=config

dn: olcDatabase={-1}frontend,cn=config

dn: olcDatabase={0}config,cn=config

dn: olcDatabase={1}mdb,cn=config
After entering the password which we gave in slappasswd, we will get the above output. Let us see what each entry means.
Explanation of entries:
-
cn=config: global settings
-
cn=module{0},cn=config: a dynamically loaded module
-
cn=schema,cn=config: contains hard-coded system-level schema
-
cn={0}core,cn=schema,cn=config: the hard-coded core schema
-
cn={1}cosine,cn=schema,cn=config: the cosine schema
-
cn={2}nis,cn=schema,cn=config: the nis schema
-
cn={3}inetorgperson,cn=schema,cn=config: the inetorgperson schema
-
olcBackend={0}mdb,cn=config: the ‘mdb’ backend storage type
-
olcDatabase={-1}frontend,cn=config: frontend database, default settings for other databases
-
olcDatabase={0}config,cn=config: slapd configuration database (cn=config)
-
olcDatabase={1}mdb,cn=config: your database instance (dc=devopsideas,dc=com)
Enabling and Enforcing TLS
When authenticating to an OpenLDAP server it is best to do so using an encrypted session. This can be accomplished using Transport Layer Security (TLS).
Here, we will be our own Certificate Authority and then create and sign our LDAP server certificate as that CA. Since slapd is compiled using the gnutls library, we will use the certtool utility to complete these tasks.
1) Install the gnutls-bin and ssl-cert packages:
apt install gnutls-bin ssl-cert
2) Create a private key for the Certificate Authority:
sh -c "certtool --generate-privkey > /etc/ssl/private/cakey.pem"
3) Create the template/file /etc/ssl/ca.info to define the CA:
cn = <Company Name>
ca
cert_signing_key
Replace <Company Name> with the name of your company
4) Create the self-signed CA certificate:
certtool --generate-self-signed \
--load-privkey /etc/ssl/private/cakey.pem \
--template /etc/ssl/ca.info \
--outfile /etc/ssl/certs/cacert.pem
5) Make a private key for the server:
certtool --generate-privkey \
--bits 2048 \
--outfile /etc/ssl/private/ldap_slapd_key.pem
6) Create the /etc/ssl/ldap.info file containing:
organization = <Company name>
cn = <Host name>
tls_www_server
encryption_key
signing_key
expiration_days = 3650
Replace <Company name> with your company name and <Host name> with the host name of your server. The above certificate is good for 10 years. Adjust accordingly.
7) Create the server’s certificate:
certtool --generate-certificate \
--load-privkey /etc/ssl/private/ldap_slapd_key.pem \
--load-ca-certificate /etc/ssl/certs/cacert.pem \
--load-ca-privkey /etc/ssl/private/cakey.pem \
--template /etc/ssl/ldap.info \
--outfile /etc/ssl/certs/ldap_slapd_cert.pem
8) Adjust permissions and ownership:
chgrp openldap /etc/ssl/private/ldap_slapd_key.pem
chmod 0640 /etc/ssl/private/ldap_slapd_key.pem
gpasswd -a openldap ssl-cert
9) Now restart slapd, since we added the ‘openldap’ user to the ‘ssl-cert’ group:
systemctl restart slapd.service
Your server is now ready to accept the new TLS configuration.
Now lets make changes in LDAP config ( cn=config ) to make use of the certificate we created for secure connection. Create the file certinfo.ldif with the following contents
dn: cn=config
add: olcTLSCACertificateFile
olcTLSCACertificateFile: /etc/ssl/certs/cacert.pem
-
add: olcTLSCertificateFile
olcTLSCertificateFile: /etc/ssl/certs/ldap_slapd_cert.pem
-
add: olcTLSCertificateKeyFile
olcTLSCertificateKeyFile: /etc/ssl/private/ldap_slapd_key.pem
Use the ldapmodify command to tell slapd about our TLS work via the slapd-config database:
ldapmodify -D cn=admin,cn=config -f certinfo.ldif
We have made changes in LDAP to accept TLS/SSL connection. However, the configuration is such that it still accepts insecure connection. Let’s enforce LDAP connection to use only TLS connection ( We are not preferring LDAP over SSL since it is deprecated in favour of StartTLS ). Create the file forcetls.ldif with the below content
dn: olcDatabase={1}mdb,cn=config
changetype: modify
add: olcSecurity
olcSecurity: tls=1
Use the ldapmodify command to enforce TLS for dc=devopsideas,dc=com DIT using the forcetls.ldif file
ldapmodify -D cn=admin,cn=config -f forcetls.ldif
We need to one other small change. Edit /etc/ldap/ldap.conf file and replace TLS_CACERT with the following content. Basically you need to point it to the CA cert that we created above
TLS_CACERT /etc/ssl/certs/cacert.pem
Restart the slapd service after the above change,
systemctl restart slapd.service
That’s it! We have enforced TLS connections to the DIT dc=devopsideas,dc=com in our openldap configuration. This makes us to use one more mandatory flag in order to specify that we need to establish TLS connection in our ldap commands.
ldapsearch -W -Z -D cn=admin,dc=devopsideas,dc=com -b dc=devopsideas,dc=com
Here -Z will issue StartTLS operation.
In the next article we will some GUI utilities that we can make use of for easier administration of openldap.

